Claude and I gave my M11, Q3 and SL3 the colors of the M9 CCD
A ColorChecker, the same APO 50, two Leicas side by side in the Maui sun, and a lot of measuring. Here is exactly how we did it.
Leica M9 · APO 50M11-P · M9 CCD profile
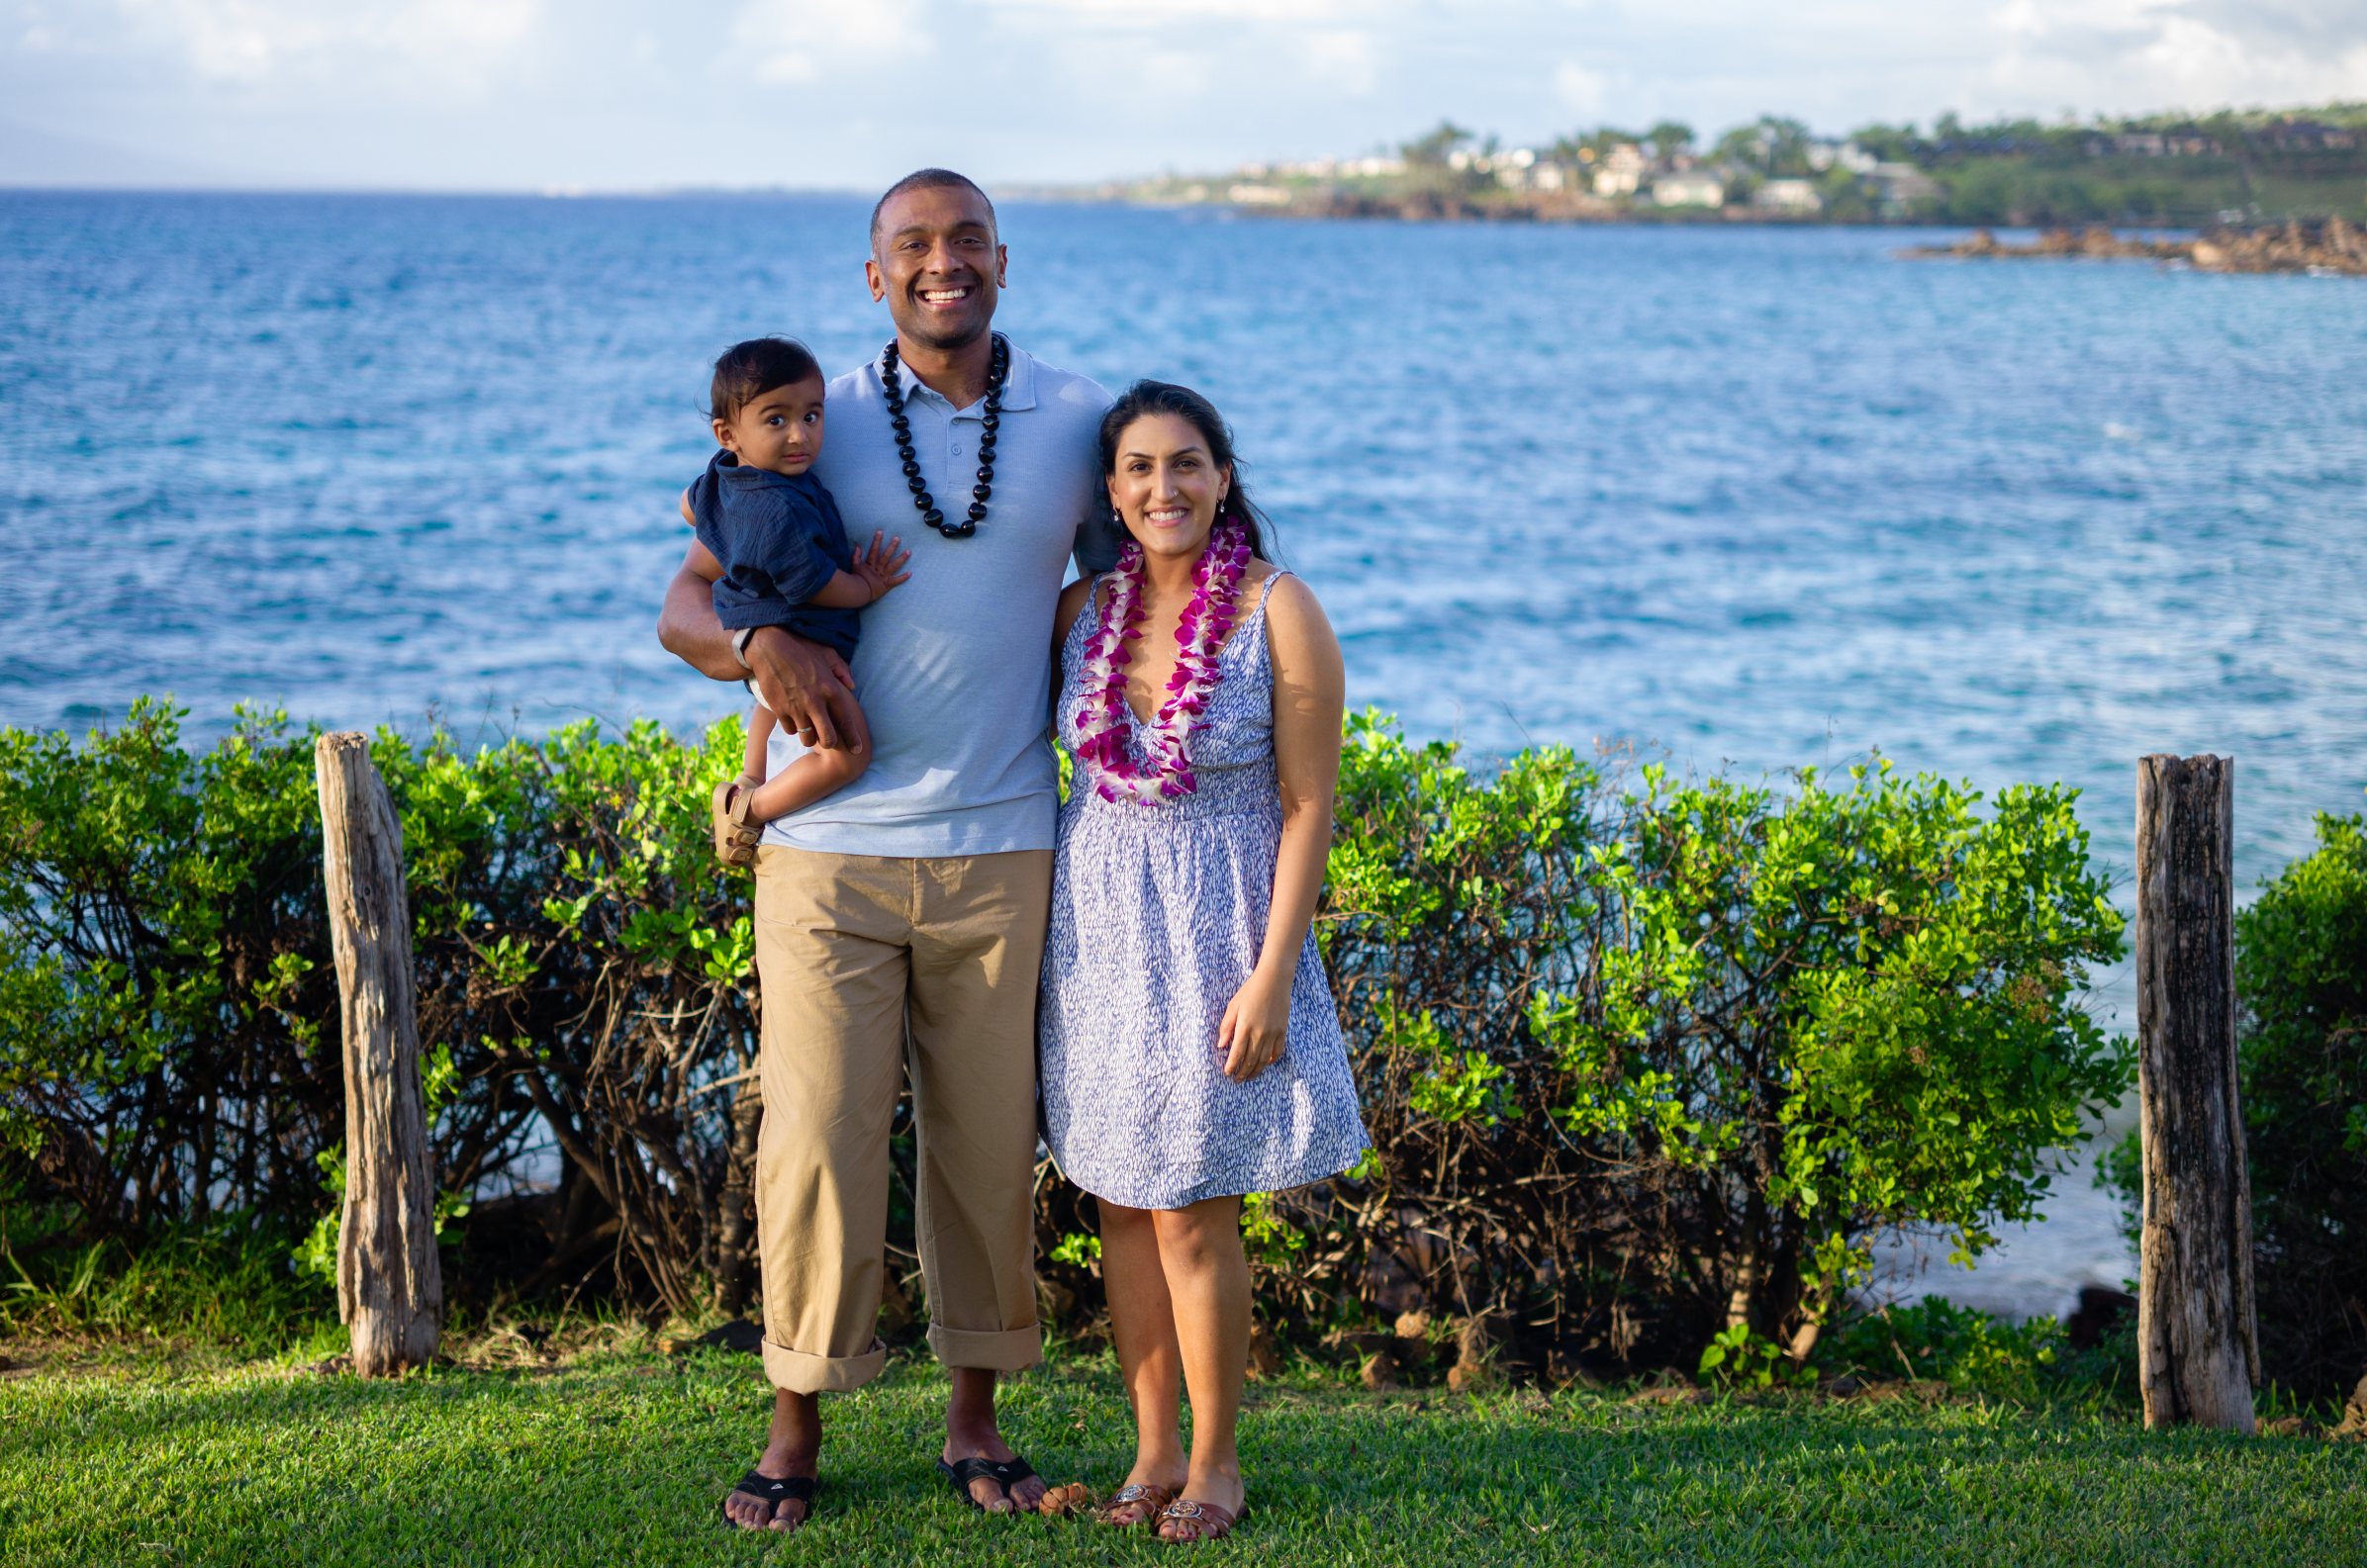
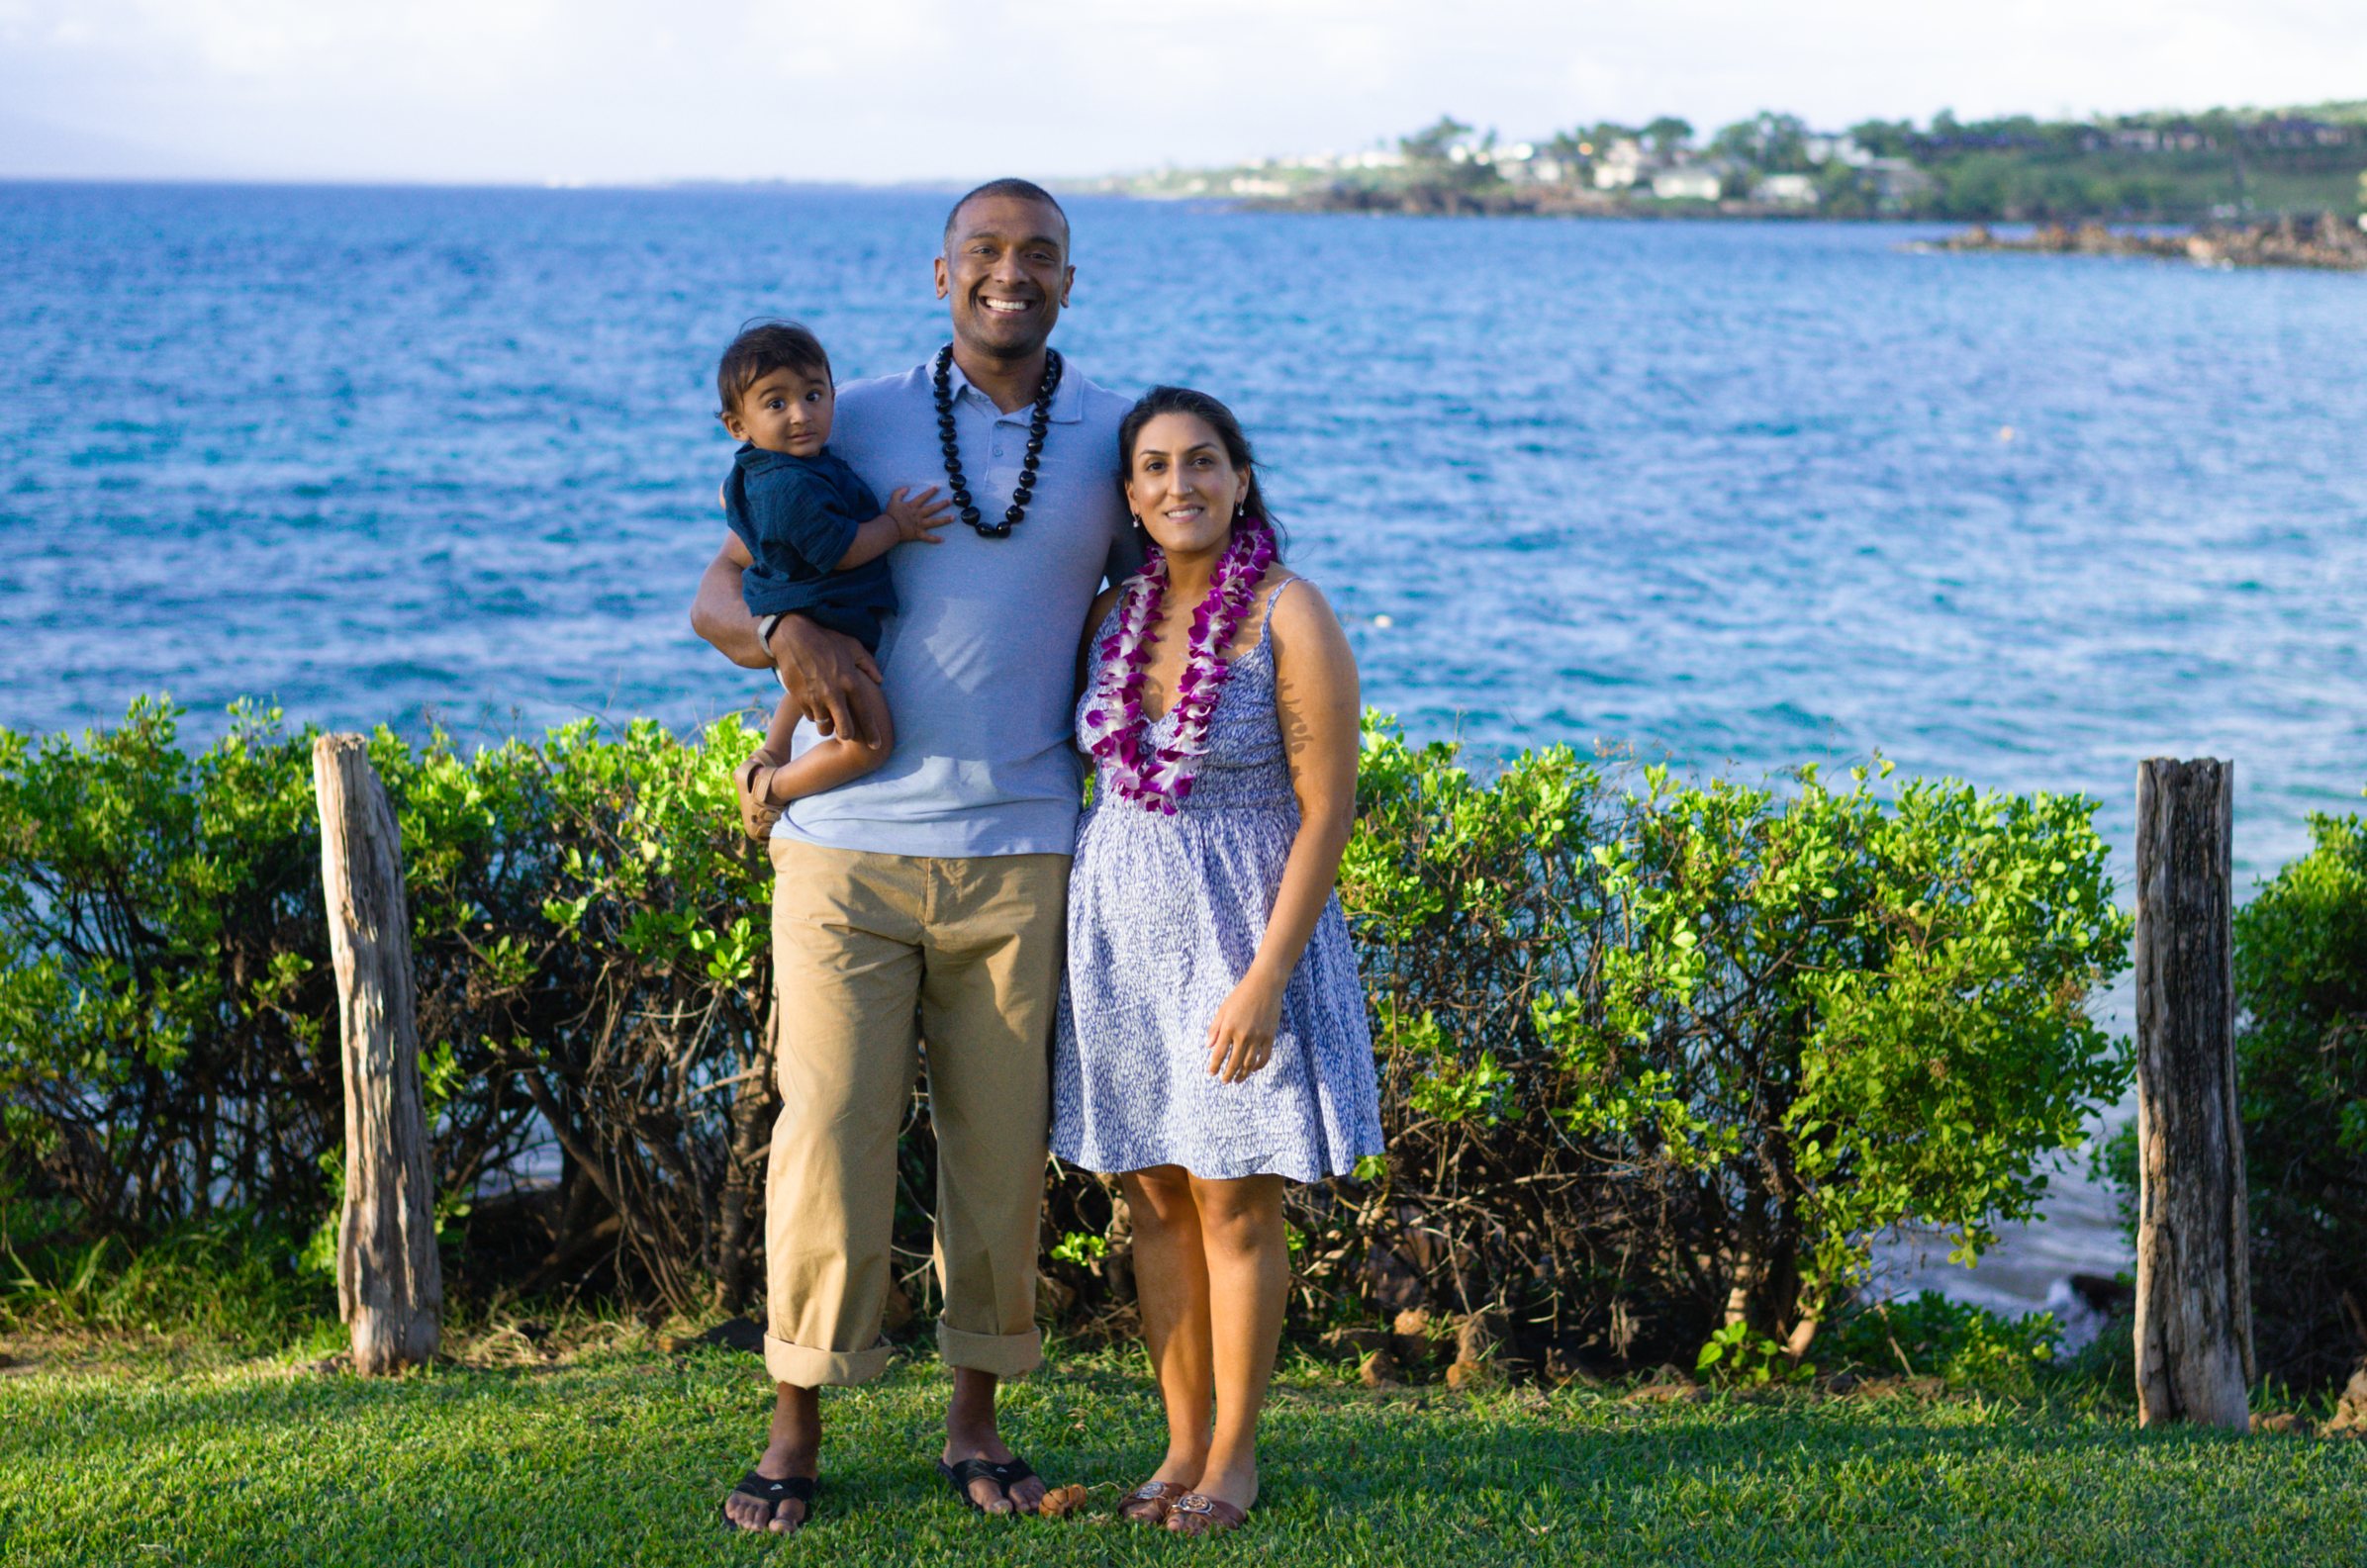
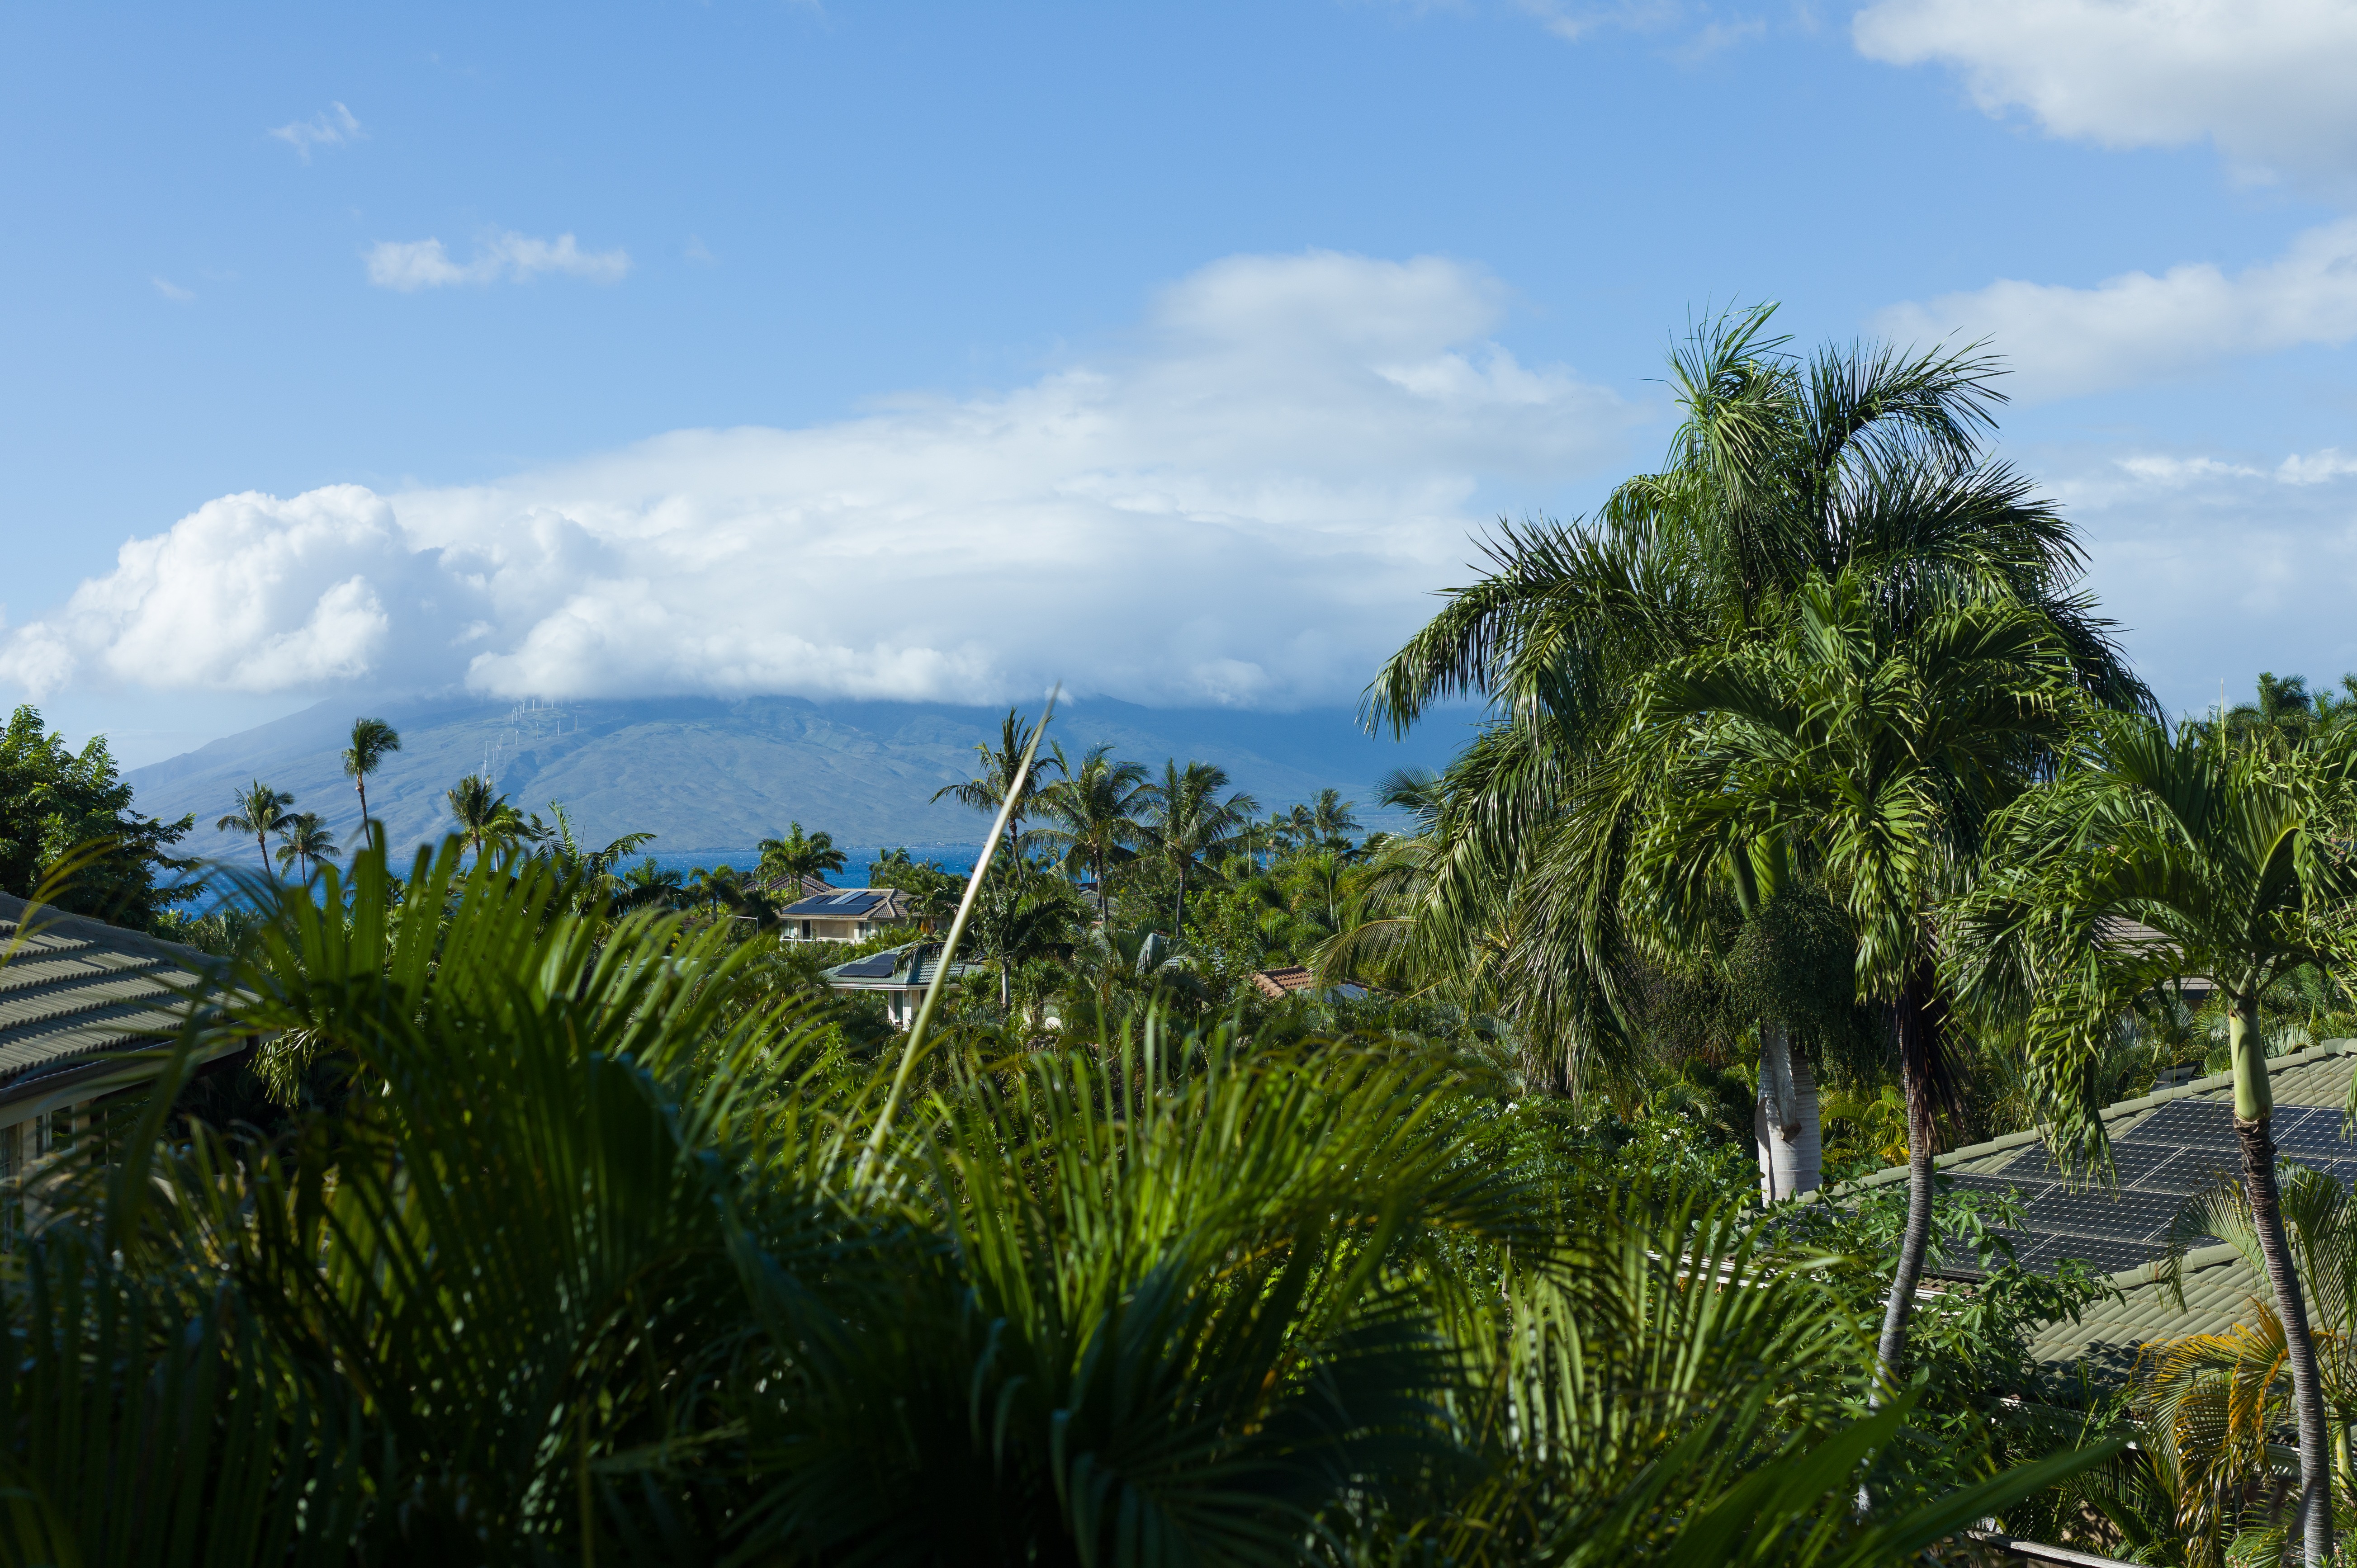
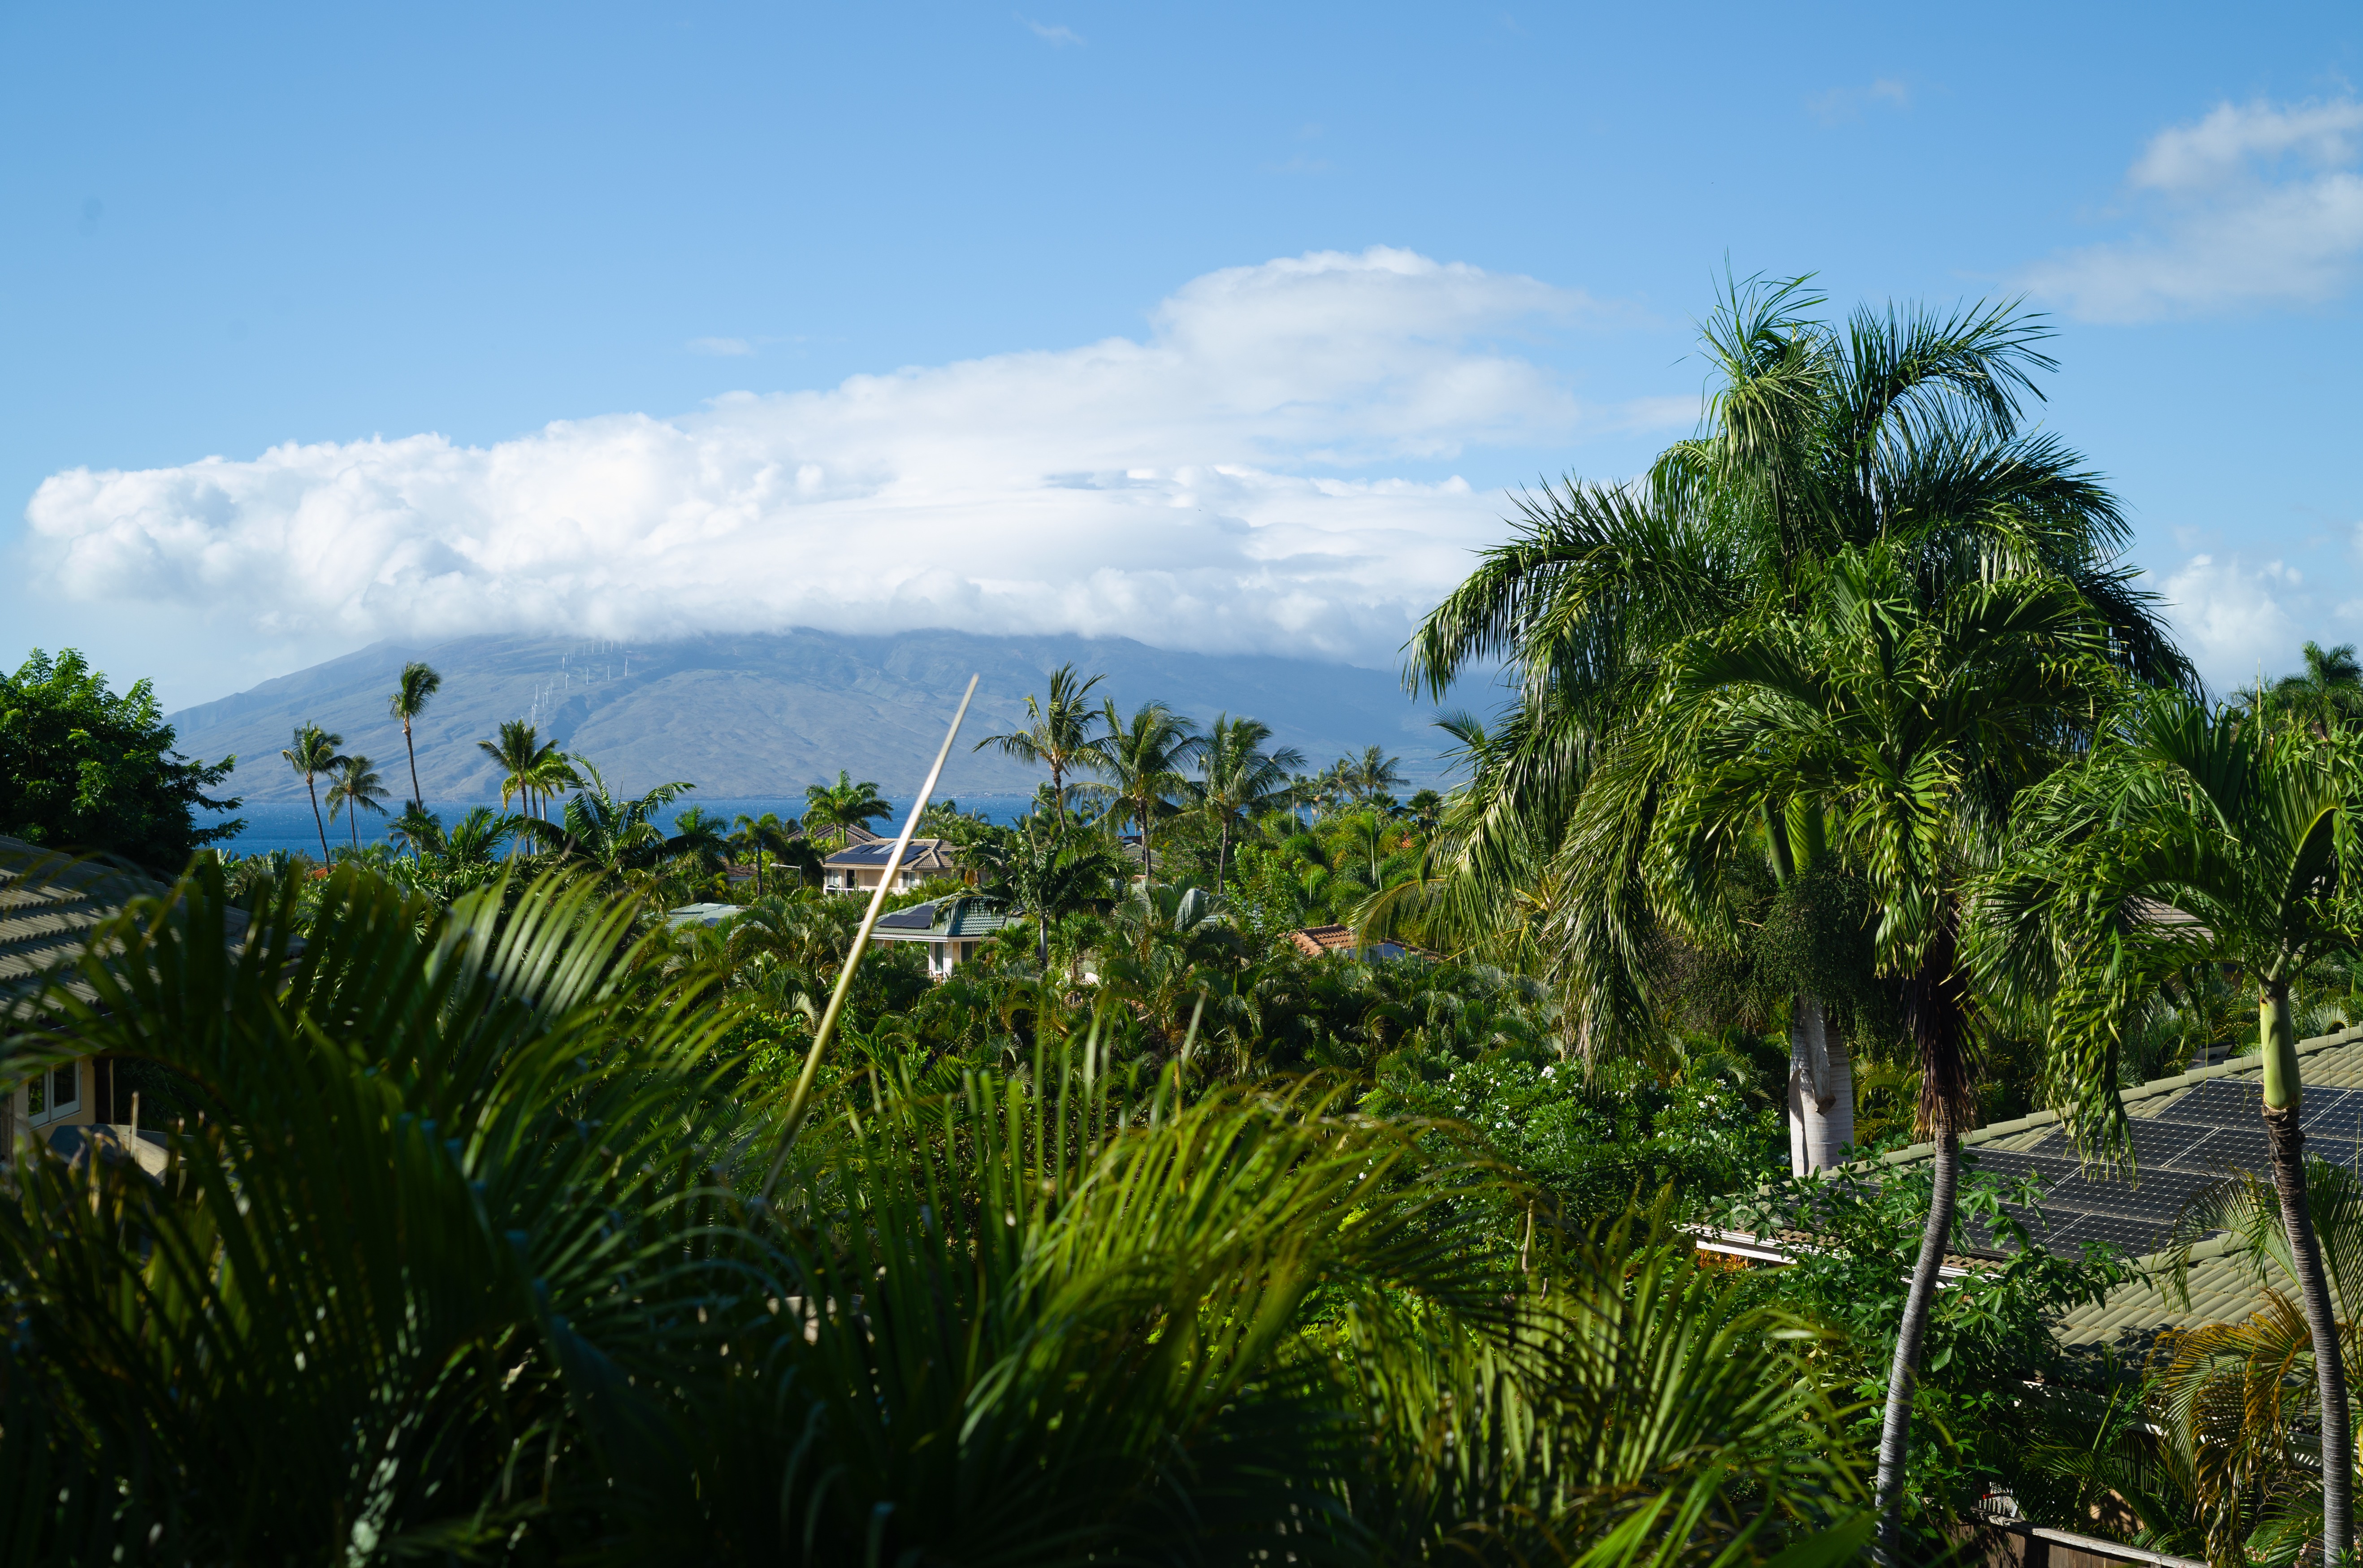
Drag the handle, or tab to it and use the arrow keys. Left: Leica M9, APO-Summicron-M 50mm f/2, 1/1500 s at f/2.4, ISO 200. Right: Leica M11-P, Summilux-M 35mm f/1.4 cropped to match, 1/4000 s at f/2.4, ISO 200, with the M9 CCD profile, or without it to see where it started. The family moved slightly between frames, so line up on the bushes and the fence posts. The numbers are in Step 7.
I have shot the Leica M9 for years, and its color is the reason I keep it. There is something about the way that old Kodak CCD draws reds, skin and dry grass that newer cameras do not do. When I picked up the M11, the files were cleaner, sharper and far more flexible, and to my eye a little too polite. So I set out, with Claude as my lab partner, to give the M11 the M9's color without giving up anything else.
Why the usual chart software can't do this
Color-checker software builds a profile that makes a camera accurate: it bends the camera until each patch matches the card's published values. Make the M9 accurate and the M11 accurate and they converge, and the very thing you loved about the M9 disappears. The trick is to point the M11 at what the M9 does to the chart, not at the chart itself.
Step 1 · Same scene, both cameras
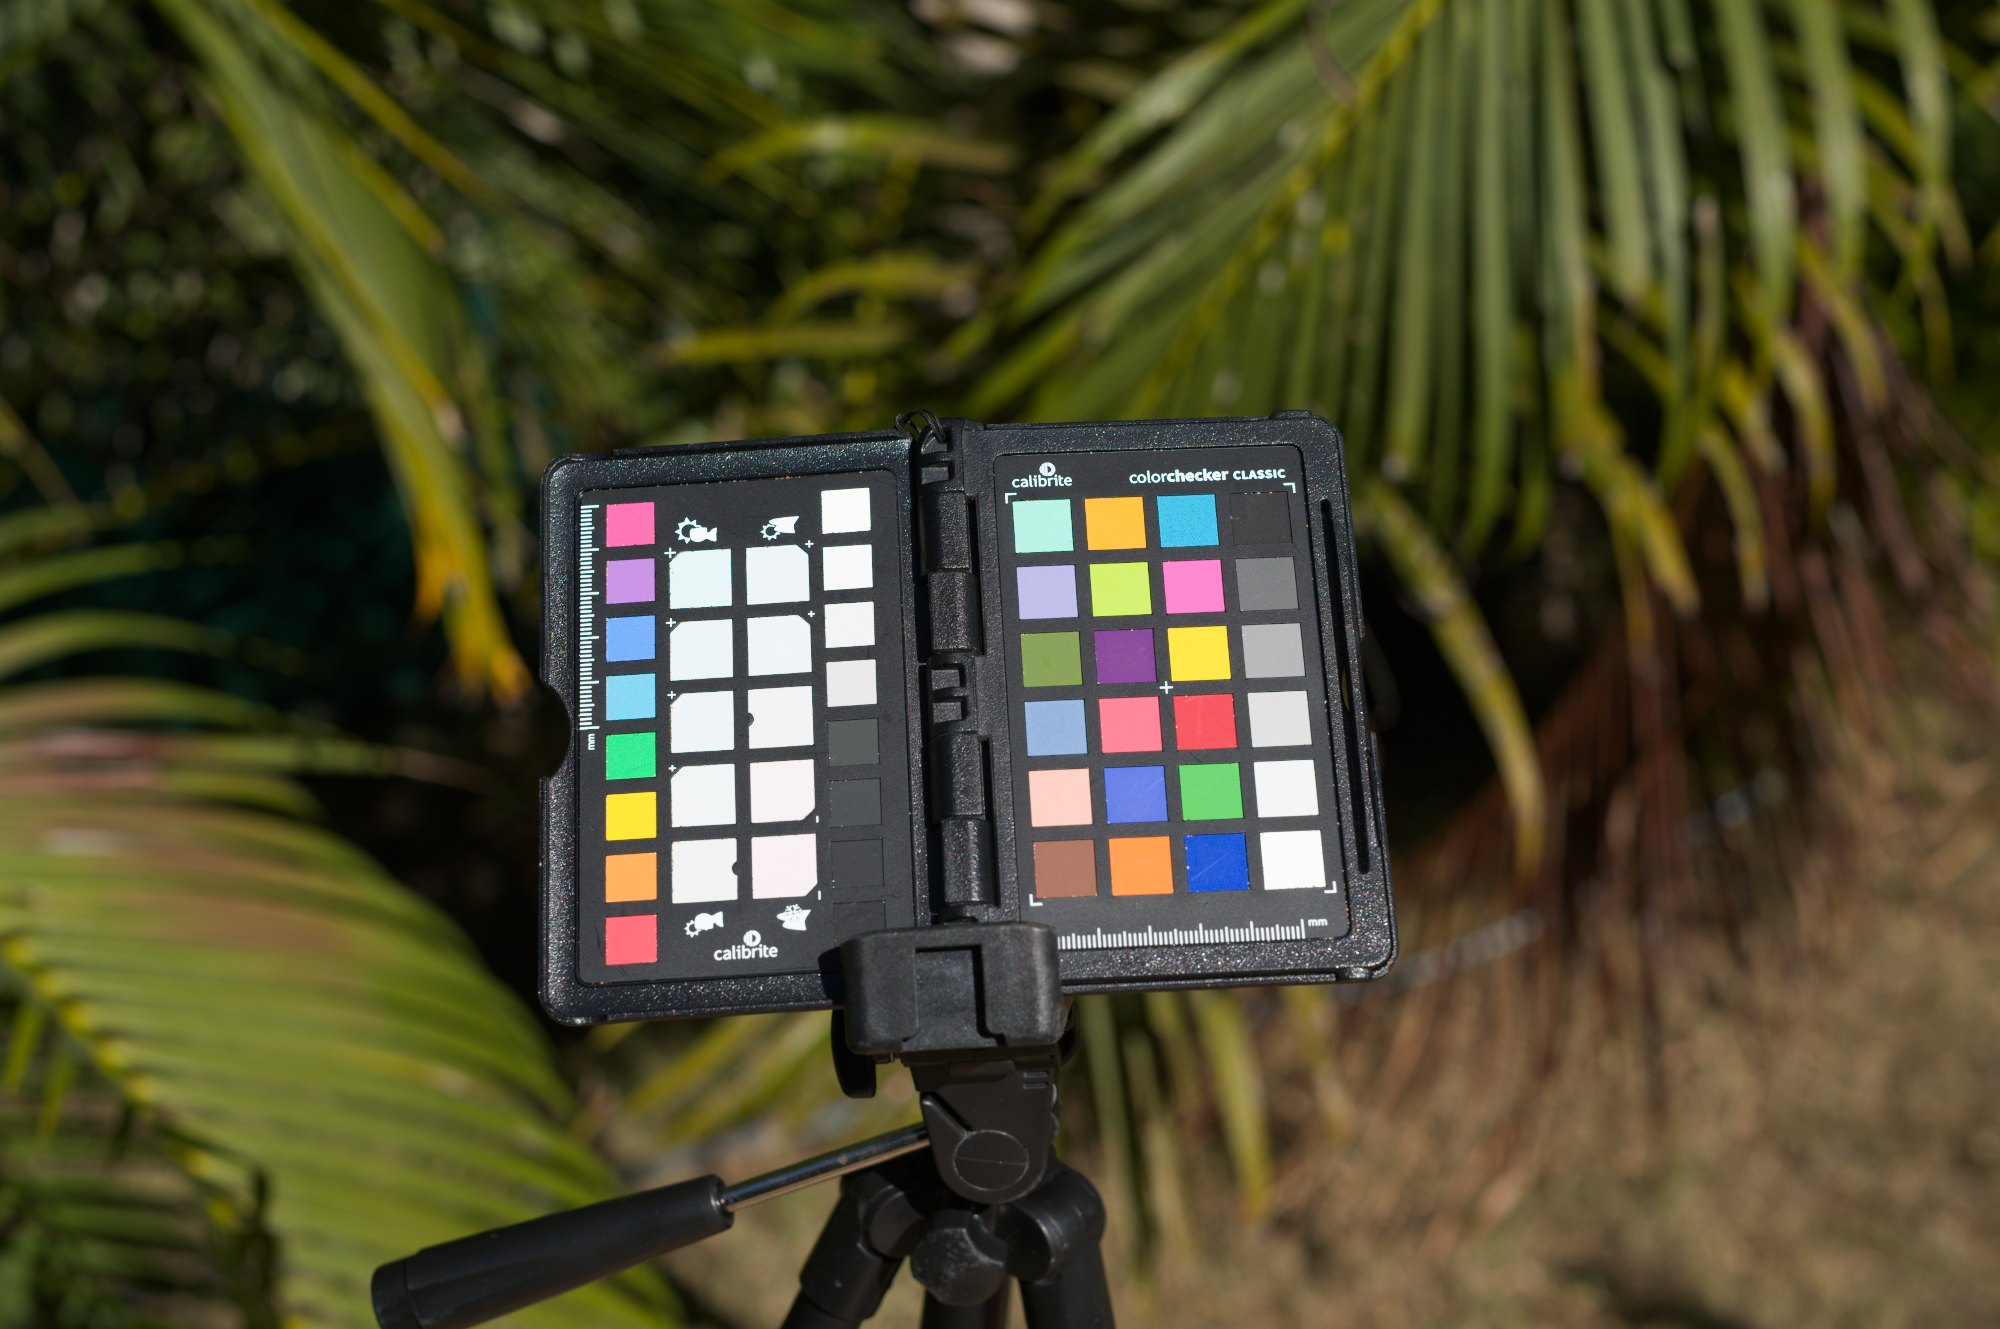
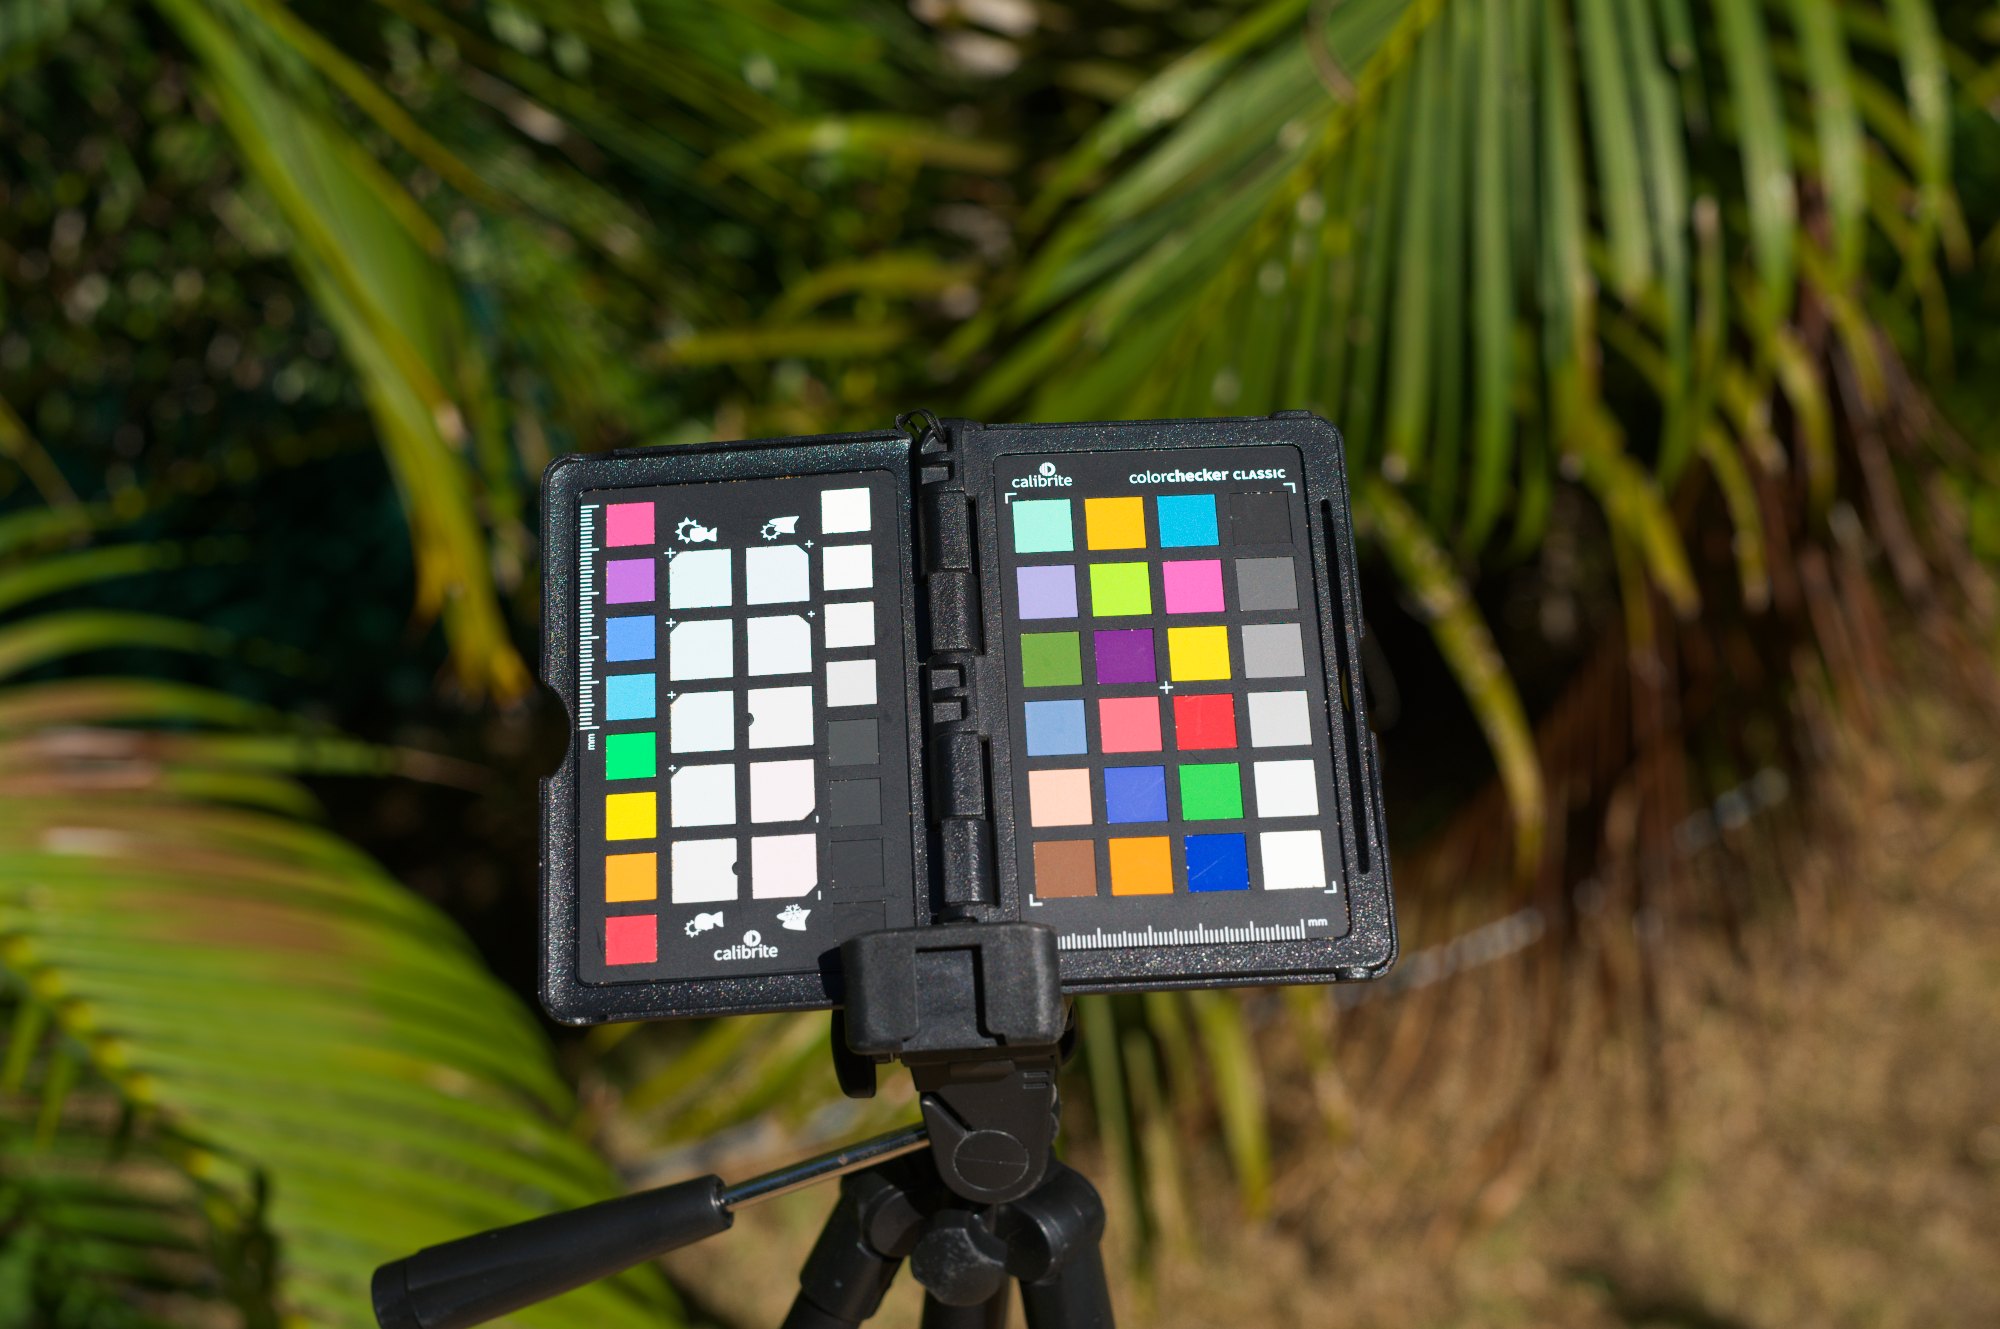
A Calibrite ColorChecker Passport on a tripod, angled away from glare, in Maui daylight.
The same lens on both bodies: the 50mm APO-Summicron. Same distance, same aperture, base ISO, DNG.
Exposed so the white patch is bright but nowhere near clipping. Minutes apart, so the light hardly changed.
Watch: shooting the ColorChecker on the M9, M11, Q3 43 and SL3 in the Maui sun (1:34). Open on YouTube
Standard colorM9 CCD profile
Drag the handle, or tab to it and use the arrow keys. Left: the M11 with its standard color. Right: the same raw file with the M9 CCD profile, or the M9 itself for reference. Same lens, same light, same exposure and tone curve; only the color profile changes.
Step 2 · The M9 becomes the target
I processed the M9 frame in Lightroom exactly the way I like it, white-balanced on a gray patch, and exported a 16-bit ProPhoto TIFF. Claude found the chart automatically, sampled the center of all 24 patches and wrote them out as a standard CGATS color file. That file is the M9 look, in numbers.
One subtlety took us two attempts. Lightroom's tone curve is baked into that export, and Adobe applies it channel by channel, which quietly saturates darker colors and desaturates brighter ones. Our first pass removed the curve from brightness only, and the two skin patches pulled in opposite directions. Removing it the way Adobe applies it fixed that, and the skin patches dropped from 3–4 ΔE to about 1.5, and later to under 1.
Step 3 · Measure the M11 where color begins
For the M11 we skipped Lightroom entirely and read the raw sensor values from the DNG. Then we built the profile in two layers, the same way Adobe's own profiles work:
A color matrix, fitted so the M11's raw colors land as close as possible to the M9's in one straight transform.
A 90 × 31 hue and saturation map that nudges what the matrix can't: up to about 9° of hue and 13% of saturation, smoothly, with the grays locked so neutrals stay neutral.
Both go into a standard DNG Camera Profile (.dcp) that Lightroom and Camera Raw read natively.
Step 4 · Check it with someone else's software
A profile can be right in theory and wrong in the file. So we rendered the M11 raw through the finished profile in RawTherapee, an independent raw converter that reads the same profile format, and compared it patch by patch with our own math. They agreed to within 0.1 ΔE on average, which means the file does exactly what we designed it to do.
3.5 → 1.3average ΔE00 to the M9 across 24 patches (M11 standard color → profile v3.2)
4.1 → 0.9average ΔE00 to the M9 on a real Maui scene: sky, mountain, trees, palms (profile v2 → v3.2)
0.3 · 1.0ΔE00 on the dark-skin and light-skin patches
0.1ΔE00 agreement with an independent raw converter
ΔE00 is the standard measure of how different two colors look. Below 1 is hard to see side by side; 2 to 3 is a difference you notice when you compare carefully.
Step 5 · Checking it in Lightroom
My first side-by-side in Lightroom looked wrong, and the cause is worth knowing before you compare your own files. One photo was still on the camera's built-in profile, and the two frames had different white balance. Once both were balanced on the same gray patch, with the M11 on the new profile and exposure matched until the grays read the same, the reds and skin lined up. If you test it, compare like with like.
Step 6 · A real scene, straight from Lightroom
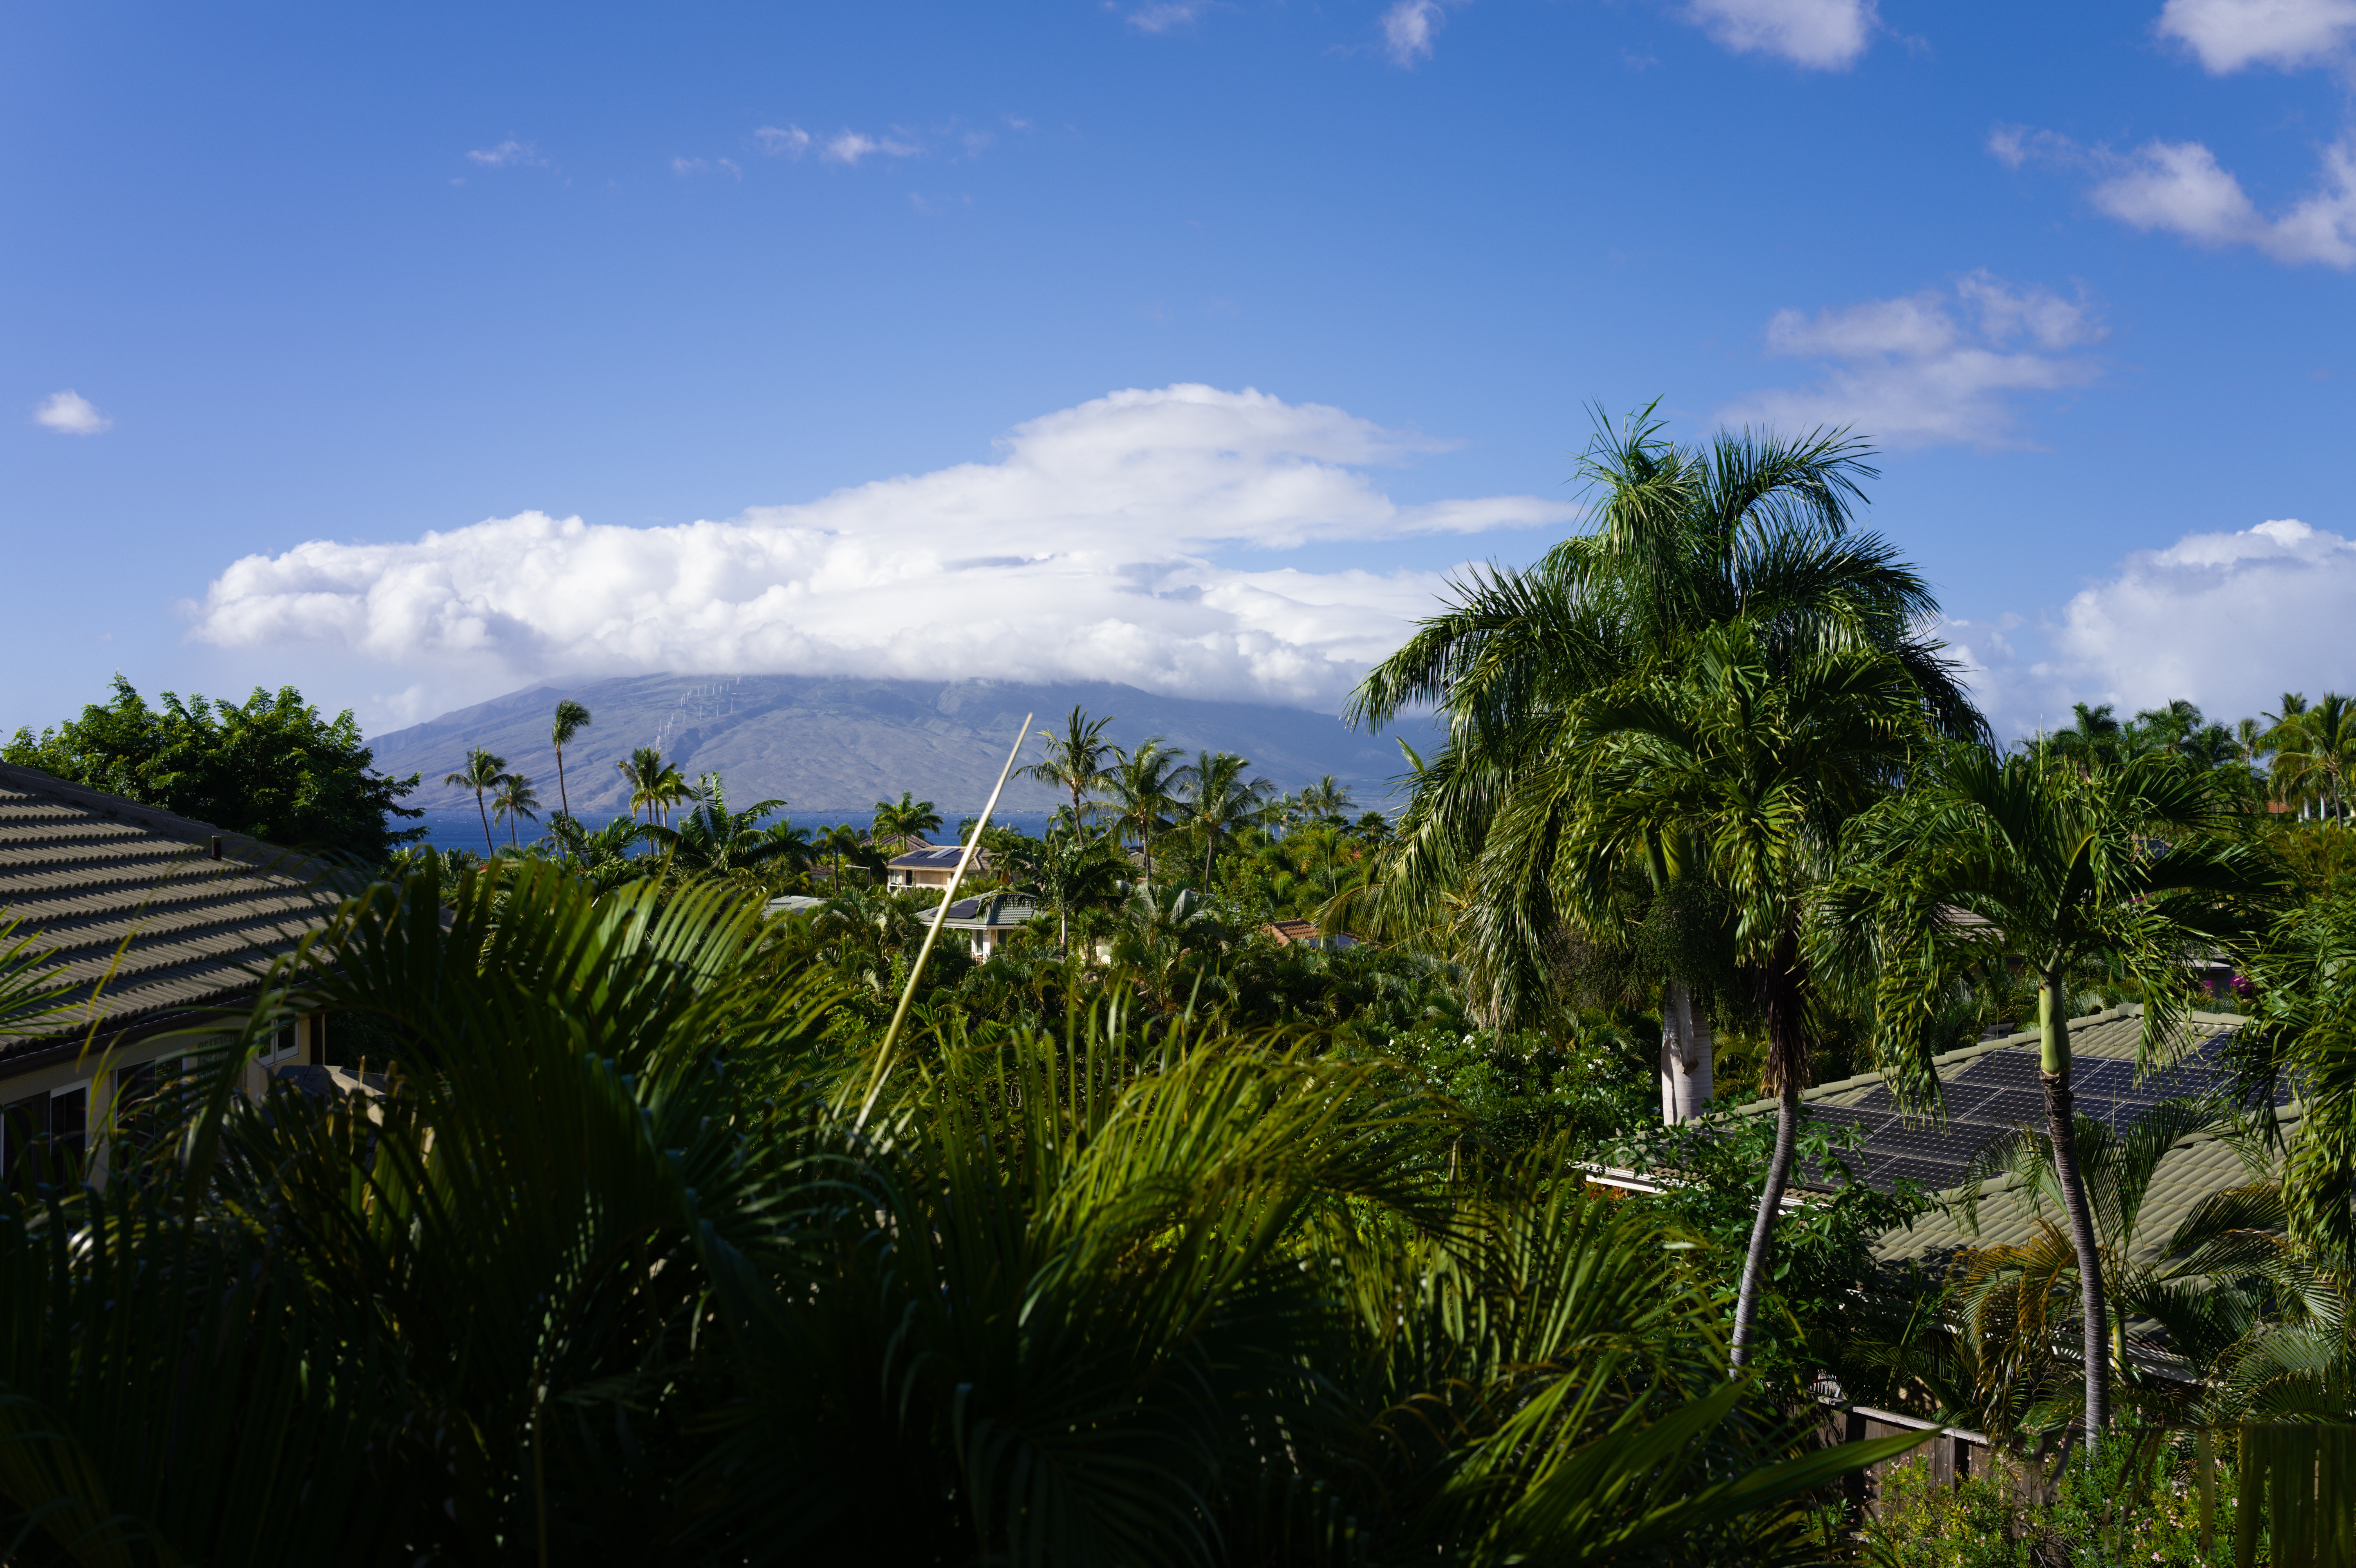
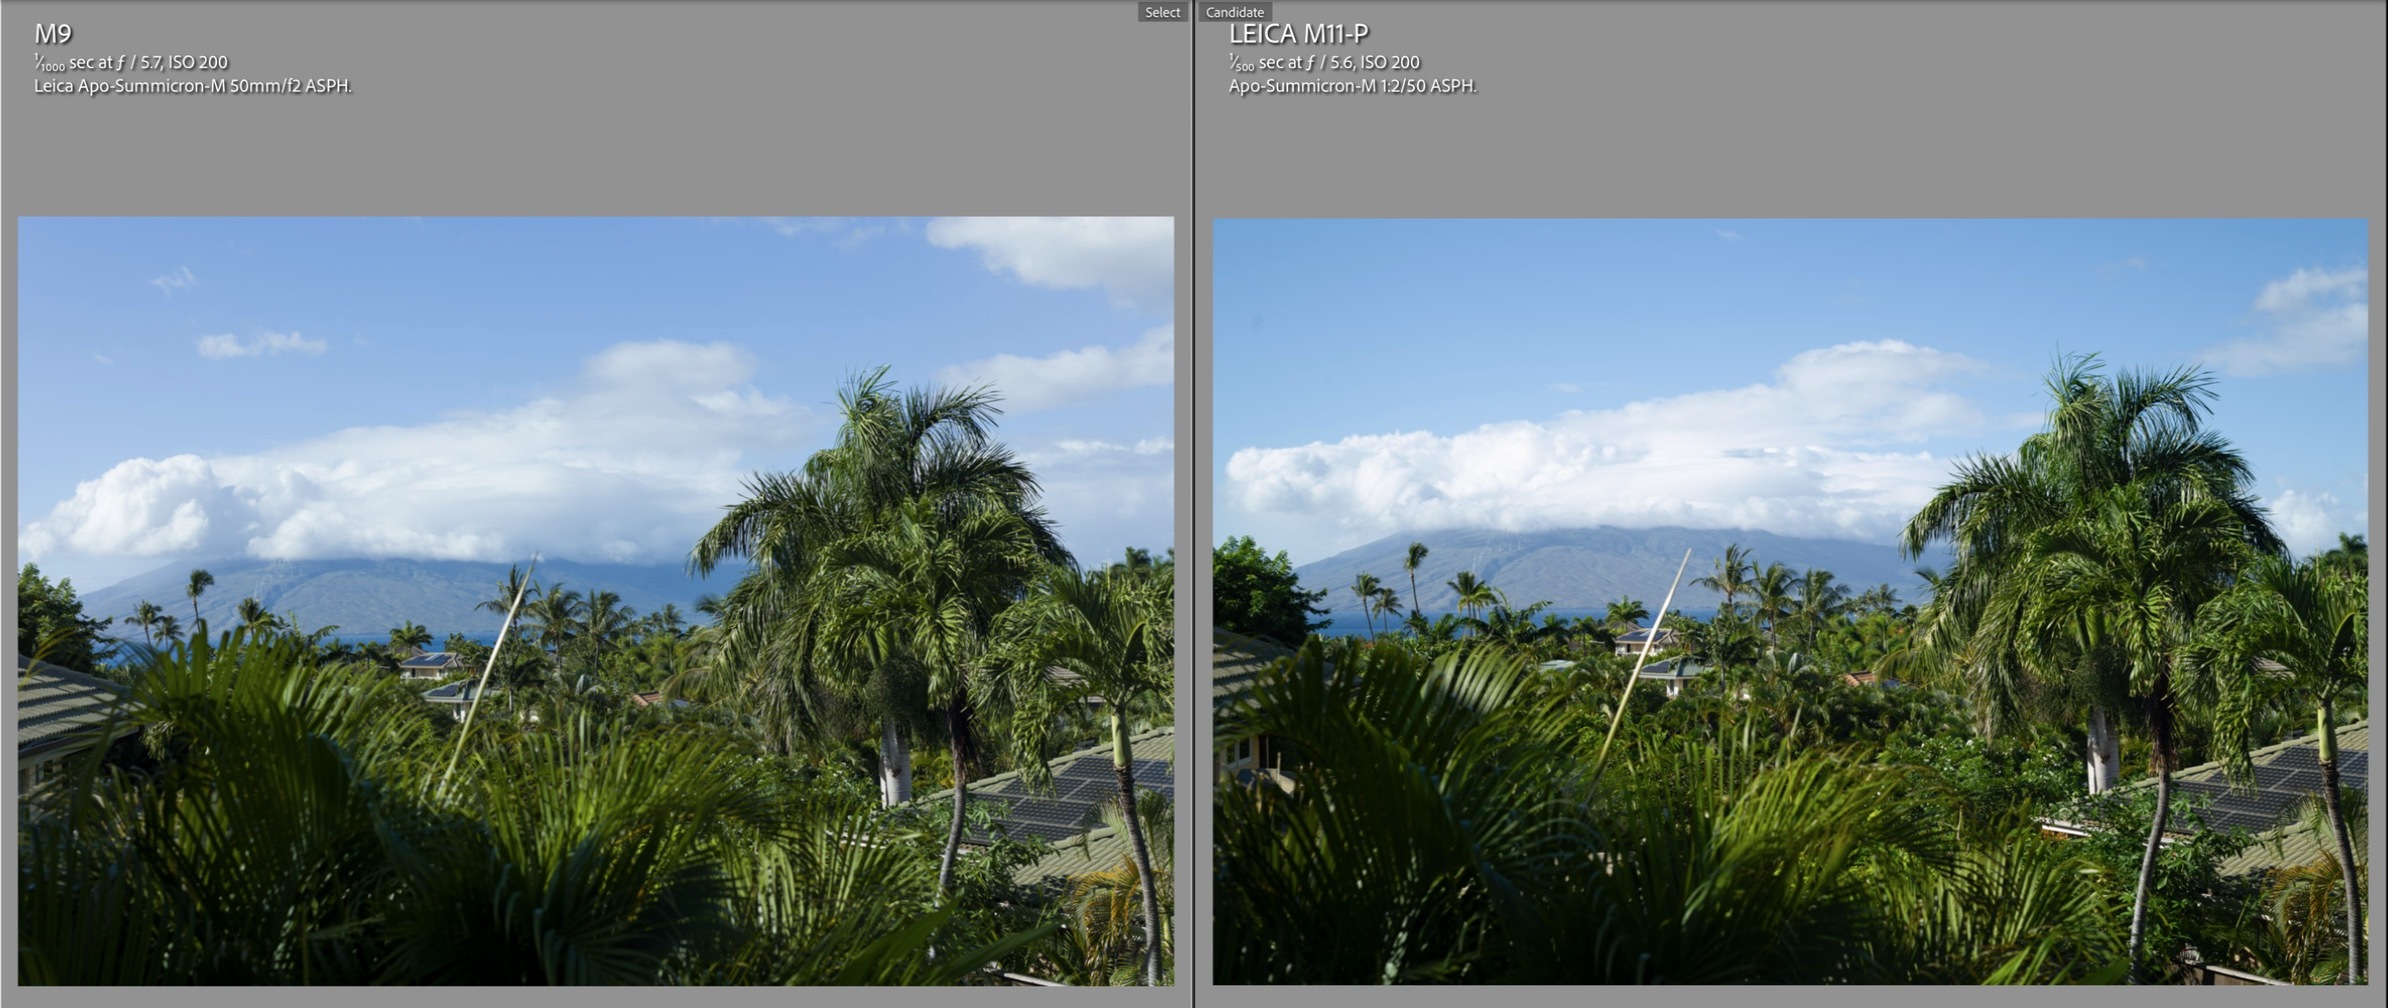
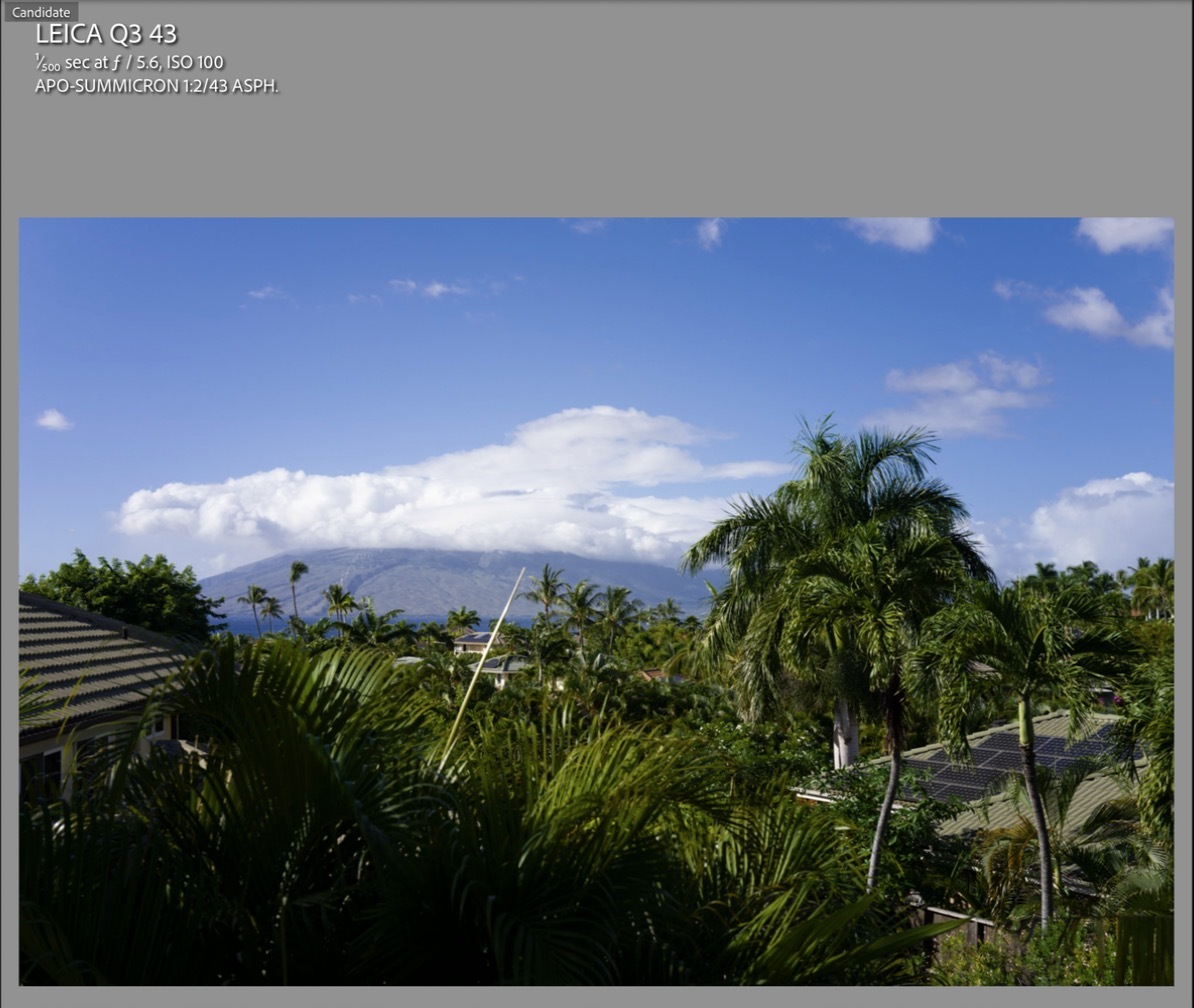
A chart is only 24 squares. So I shot the same Maui view on the M9, the M11-P and the Q3 43 within ten minutes, with the APO 50 on both M bodies, and lined them up in Lightroom with the info overlay showing camera, exposure and lens. On that first look the M11 and Q3 skies were a few degrees too cyan and the palms a touch too green next to the M9. Version 3 of the profile corrected both (refined since in 3.1 and 3.2, below), so skies take on the M9’s deeper blue and foliage its warmer olive, while skin tones stay where the chart put them.
Lightroom Compare view. Left: Leica M9, the reference (1/1000 s, f/5.7, ISO 200). Right: Leica M11-P with the M9 CCD profile and contrast matched to the M9 (1/500 s, f/5.6, ISO 200). Same APO-Summicron-M 50 on both.Leica Q3 43. 1/500 s, f/5.6, ISO 100, built-in APO-Summicron 43.
The numbers. Measured on four parts of the frame (sky, mountain haze, trees and palms), with lightness matched so only color counts, the M11 went from an average 4.1 ΔE00 away from the M9 on version 2 to 0.6 on version 3, and sits at 0.9 on the current version 3.2 after the family-session blue correction in Step 7 (sky 1.2, mountain haze 1.2, trees 0.8, palms 0.6). The Q3 43 went from 4.0 to 3.1: I corrected its hue only and left saturation alone until I have a second scene to confirm it. The trade-off is on the chart. Its blue-sky and foliage patches are printed inks, not sky and leaves, and they now sit a little further from the M9, so the M11’s chart average moved from 0.8 to 1.4 ΔE00 on version 3; version 3.2 brings it back to 1.3. Skin did not move: 0.3 and 1.0, essentially as before. Real scenes are what you photograph, so that is the side I chose.
Lightroom screenshots from my own catalog, unretouched. Tap the magnifier to see them full screen, or download the full-resolution JPGs above. Exported at full size, quality 92, sRGB, camera data kept and location removed. The overlay is Library › View Options › Loupe Info with Camera Model, Exposure and ISO, and Lens, which is a handy setup for any side-by-side test like this.
Step 7 · Skin: a family session on Maui
Skin is the reason most people want M9 color, so I took the M9 and the M11-P to a real family session at the end of the day. Same light, a minute apart: the M9 with the APO-Summicron 50 and the M11-P with the Summilux 35, cropped in Lightroom to match the 50’s framing. Both are set to the same white balance (Daylight, 5500 K) and the same tone settings. The M9 is on Lightroom’s default Adobe Color profile, which is what the M9 CCD profile was built to match. That comparison is the slider at the top of this page.
How close it is. I aligned the two frames and compared about 1,150 small patches of everything that did not move (ocean, bushes, grass, fence posts), with lightness matched so only color counts. Without the profile, the M11-P sat an average 3.3 ΔE00 from the M9 (median 3.1, standard deviation 2.1). With the M9 CCD profile it is 2.4 (median 2.0, standard deviation 2.2). The bushes and the lawn are now essentially identical to the M9, at 0.5 and 0.4 ΔE00, down from 2.8 and 4.1.
Skin, version 3.1. Looking at this frame, I could see the M11 skin was a touch greener than the M9’s. The numbers agreed: on faces, the M11 hue sat a few degrees toward yellow-green and was less rich. Version 3.1 adds a small correction that only touches golden-hour skin tones, leaving the ColorChecker skin patches and everything else exactly where they were. The woman’s face went from 4.8 ΔE00 without the profile, to 3.1 on version 3, to 2.3 on version 3.1. The man’s went from 5.3 to 4.2 to 3.3. Her arm is a little richer than the M9 now (1.9).
Blues, version 3.2. The ocean and his blue shirt read slightly magenta next to the M9. That is the opposite of the palm scene in Step 6, where the M11 sky was too cyan, so I split the difference: version 3.2 pulls blues back 2° toward cyan. The ocean went from 2.3 to 1.9 ΔE00 and the shirt from 5.8 to 4.9, while the Step 6 sky stays close to the M9 (about 1.2) and the chart average improves to 1.3. Dyed fabric and sea water simply land differently on the two sensors than sky does, so no single profile can make every blue identical. The khaki trousers are still slightly more yellow. Part of every number is simply two different lenses and a minute of moving light, which is also why the standard deviation barely changes.
Deep skies, version 3.3. An M11 owner sent me a frame of a strong, saturated blue sky where the profile pushed it too far toward violet. The M9 does lean purple in skies, but on a deep sky the M11 version overdid it. Version 3.3 eases that push by about two thirds in saturated sky blues only (Adobe hues of roughly 210–255°); skin, foliage, the chart grays and every other color are unchanged. Thank you to the readers who send me their files: that is how this profile keeps getting better.
The Q3, Q3 43 and SL3
The Q3 and SL3 share the 60-megapixel generation of sensor with the M11, so I assumed one profile would do. The files said otherwise: the glass and filters in front of each sensor differ enough that a straight conversion through Leica’s own color data landed about 3 ΔE from the M9, with skin off by 4 to 6. So I photographed the same ColorChecker on my Q3 43 and my SL3, and each camera got its own full fit to the same M9 target.
One patch needed restraint. On both cameras the bluish-green patch wanted about 45% more saturation, and that hue is Maui’s ocean teal. Rather than risk a garish sea, we capped the correction at +25% and accepted a slightly larger miss on that one patch.
Camera
Chart ΔE00 to the M9
Dark / light skin
Real scene ΔE00, v2 → current
How
M11 & M EV1
1.3
0.3 / 1.0
4.1 → 0.9
Chart + two Maui scenes (v3.2)
SL3
1.0
0.8 / 1.0
—
Chart-measured; scene test to come
Q3 43
1.6
1.3 / 1.0
4.0 → 3.1 (v3)
Chart + Maui scene (hue only)
Q3
—
—
—
Uses the Q3 43 measurement: same sensor, different lens
Each profile was also checked in RawTherapee: 0.1 ΔE or better against our own math on every camera.
What it is, and what it isn't
It reproduces the M9 as Lightroom renders it with Adobe Color, the way I like my M9 files.
It is built for daylight. It works under other light, but daylight is where it was measured.
It is a color profile, not a film emulation. Grain, vignette and the M9's lower dynamic range are not part of it; your M11 files keep all of their latitude.
It works in Lightroom Classic, Lightroom (desktop) and Camera Raw. It doesn't work in Capture One.
Questions
Does it work on my regular M11? Yes. Every M11 uses the same 60-megapixel sensor, so the M11 download covers the standard M11 and the P and D versions; install all three small M11 files in it and Lightroom shows the profile for whichever M11 you shoot.
Does it work on the Leica M EV1? Yes. The M EV1 is built on the same 60-megapixel sensor as the M11, so it gets the same profile. It is included in the M11 download: install the M9-CCD-M-EV1 files and Lightroom shows “M9 CCD · M EV1”.
Do I need a ColorChecker? No. The measuring is done; you install a file. A gray card or any neutral surface helps you set white balance, but isn't required.
Will my old presets still work? Yes. Choose the M9 CCD profile first, then apply any preset that doesn't change the profile.
Can I make one for my own camera? The method works for any two cameras. If you'd like one for a different body, write to me.
Want a Kodachrome look instead? The K64 presets were built the same way, from measured color.